How to Improve CCTV Night Vision: Expert Tips
You've probably got a camera that looks fine in daylight, then turns into a blurred white blob the moment the sun drops. The problem usually isn't one magic setting, it's the whole chain, from camera mode and placement to lighting, dirt, and maintenance. If you want better CCTV night vision, focus on the environment first, then the hardware.
Table of Contents
- Optimising Camera Settings and Infrared Basics
- Correcting Positioning and Mount Height Errors
- Measuring Light and Adding External Illumination
- Weatherproofing and Lens Maintenance Routines
- Evaluating Upgrades and Professional Installation
- Troubleshooting Common Night Vision Failures
Optimising Camera Settings and Infrared Basics
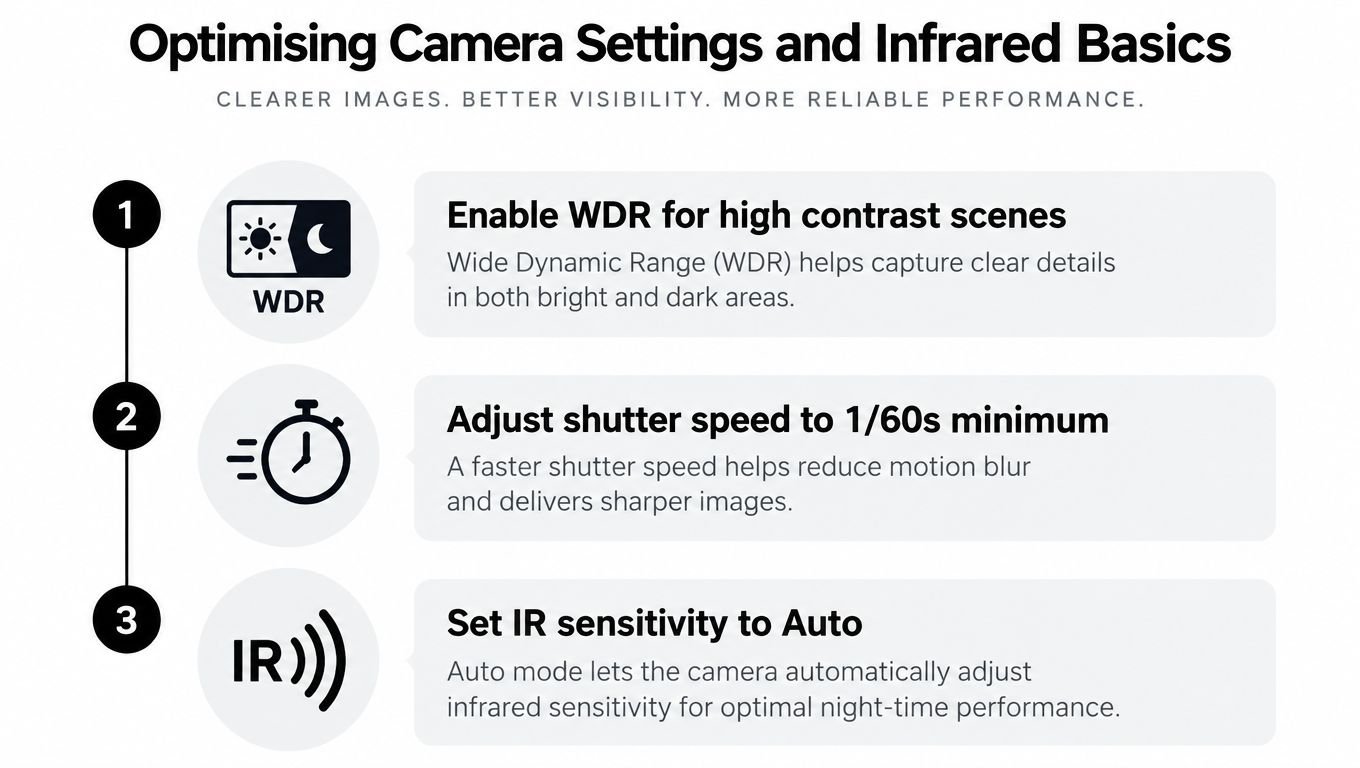
A common complaint goes like this, the day footage is sharp, but at night the camera either floods the scene with light or drops into grainy black and white that shows almost nothing useful. That usually means the system is working against the dark instead of using infrared illumination properly. UK police guidance says night-vision cameras are more effective in low light because they record in black and white using infrared illumination, and motion detection helps reduce stored footage by only recording movement, which keeps the system focused on real events rather than empty overnight hours (West Yorkshire Police CCTV advice).
Start with the mode, not the marketing label
If the camera has a day and night mode, make sure it switches cleanly into infrared at dusk. Many systems advertise “colour” or “smart” night features, but if the scene is too dark, standard colour recording usually gives you noisy footage with poor identification value. In practice, IR night vision is the baseline you want for genuine low-light evidence, not a nice extra.
A camera's IR cut filter matters because it controls how the sensor handles colour by day and monochrome by night. If that filter doesn't switch correctly, the image can look washed out, tinted, or strangely soft even when the LEDs are on. That's why a decent setup starts with correct night mode behaviour before you touch anything else.
Practical rule: if a camera can't produce a stable black-and-white image in darkness, don't assume it's a placement issue first. Check the night mode and infrared behaviour before you spend time chasing other faults.
Balance infrared strength and recording behaviour
Too much IR can be as annoying as too little. Close subjects can blow out into bright faces or reflective patches, while the background disappears. Too little IR leaves the far end of a driveway or yard unreadable, which defeats the point of recording after dark.
You won't always fix that in software alone. Some cameras do better with automatic IR sensitivity, while others need a careful reduction in LED intensity if the subject stands close to the lens. The goal is a usable scene, not a bright one. Useful detail beats brightness every time when the footage might be used as evidence.
Motion-triggered recording is another setting that deserves attention. It won't improve image quality by itself, but it stops the recorder from filling with hours of empty black frames. That matters because overloaded storage and endless replay through irrelevant footage make it harder to find the exact moment that counts.
Correcting Positioning and Mount Height Errors
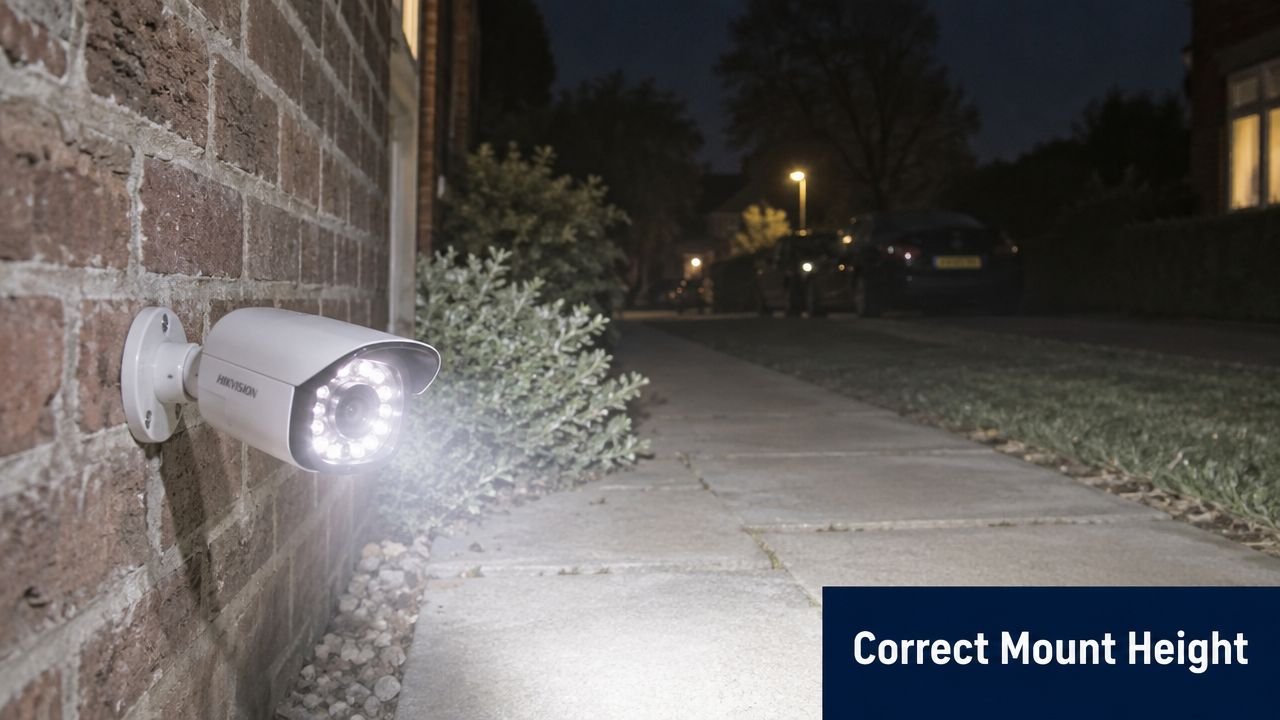
A camera can have excellent IR, clean settings, and decent resolution, then still fail because it's pointing at the wrong part of the world. I've seen plenty of systems where the camera itself was fine, but the soffit, wall, or nearby surface reflected the infrared light straight back into the lens. The result is a milky foreground, dim background, and no usable detail where it matters.
Stop infrared bounce before it starts
Infrared behaves like light because it is light, so nearby surfaces can scatter it straight back at the camera. Eaves, soffits, walls, and window reveals are the usual culprits. If the camera is tucked too close under a protruding roofline, the housing or the surface above it can become a reflector that ruins the scene.
The fix is simple in principle, but not always convenient in practice. Give the lens clear air. Keep the field of view away from shiny surfaces, pale render, and anything that can throw back IR glare. If the camera must sit near a structure, adjust the angle so the LEDs illuminate the target area, not the mounting point.
A camera also struggles when it looks straight at headlights. Vehicle lights can force the exposure to swing wildly, which leaves the rest of the frame poorly balanced after the car passes. For drives, entrances, and access roads, place the lens so it sees the route, not the direct beam path.
Use mount height for the job, not just for convenience
Higher isn't automatically better. A camera mounted too high may cover more ground, but faces become harder to read and hooded figures disappear into angle and shadow. Lower mounting improves detail, but it can create vandalism risk and increase the chance of IR bounce from nearby surfaces.
The right height depends on what you need to identify. For a front door, you want facial detail and a clear approach path. For a car park edge or perimeter run, you may care more about movement across the line than a close-up face. The angle should match that goal instead of copying a generic installation.
Mount the camera for the evidence you actually need, not for the neatest cable route.
If you're unsure about safe electrical isolation or how a camera's feed is being supplied, a resource on circuit breaker switch Brisbane houses can be a useful reminder that the power side matters too. It's not a CCTV guide, but it's relevant when people start chasing faults without considering the circuit feeding the system.
You can also use a placement guide such as where to place CCTV cameras to sanity-check whether the lens is looking at the right approach line in the first place. Good night vision starts with the field of view.
Measuring Light and Adding External Illumination
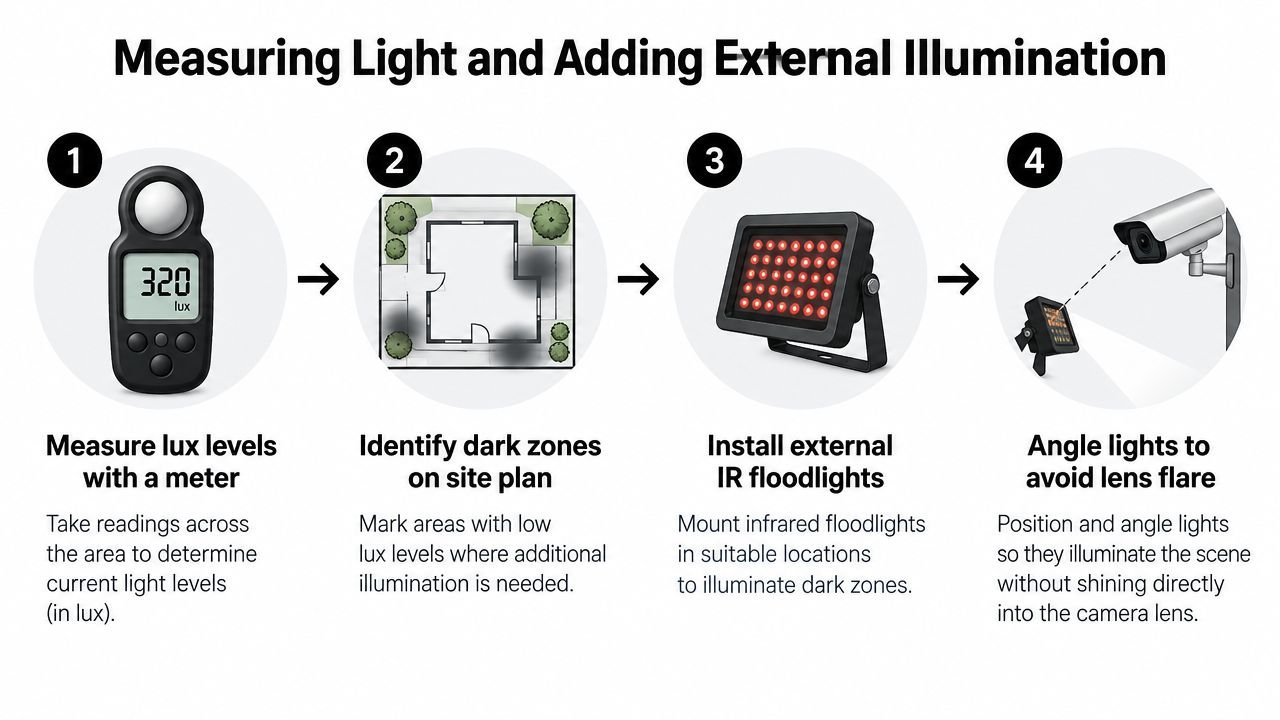
Built-in LEDs are fine for a doorway or a short path, but they rarely cover a large yard, warehouse edge, or long driveway properly. The common mistake is guessing at darkness instead of measuring it. Check the actual night scene first, then match the camera and lighting to that environment.
Measure the scene before you buy more hardware
The National Protective Security Authority says perimeter CCTV should use fixed-view cameras in a heel-to-toe overlap with no coverage gaps, and visible-band cameras need perimeter lighting with a minimum light level of 3 lux (NPSA CCTV guidance). That matters because “night vision” on the box tells you very little if the target area is too dark or lit unevenly.
Use a light meter at the actual recording positions, not just near the house wall or by the door. Take readings at 1m height at the gate, mid-drive, and far boundary at 11pm with house lights off, then aim for even coverage rather than a single bright flood. Check the dark corners, the far end of the drive, the edge of the loading area, and any spot where a person would pause. If those points vary sharply, the camera is fighting shadows instead of capturing detail.
Once you know the light pattern, decide whether you need more IR or better visible lighting. For camera systems that rely on visible-band recording, the scene needs enough light to support resolvable detail. If the site will not hold that level consistently, IR coverage is usually the safer choice.
Add illumination where the camera needs it
External IR illuminators work well when the camera's built-in LEDs fall short. They extend range without flooding the area with visible glare, which helps on car parks, long drives, and boundary lines. Aim them so they cover the target zone evenly, not the lens itself.
Avoid hotspots and sharp shadows. A badly placed floodlight can make one part of the scene bright and another part disappear. If you are adding standard security lighting as well, keep the light off the lens axis as much as possible, otherwise lens flare will weaken the picture.
For homeowners comparing exterior lighting options, a guide on outdoor lighting ideas for Prescott homes shows how placement of exterior lights changes visibility. The point is the same. Light should help the camera, not fight it.
If you want to compare how a controlled light layout looks in practice, the embedded video below is a useful reference point.
Weatherproofing and Lens Maintenance Routines
A lot of night vision failures don't appear all at once. They creep in. One week the picture looks acceptable, the next it's foggy at the edges, then a spider web catches the IR and the whole scene looks like it's been sprayed with mist. By the time someone notices, they usually only discover the problem after an incident.
I've seen cameras blamed for “poor night performance” when the underlying issue was dirt, moisture, or a seal that had started to fail. Rain spots and dust don't just sit on the lens, they scatter infrared light and create bright halos around the scene. That turns a potentially useful image into something soft and almost unreadable.
Treat the lens like a working optical surface
Use a soft microfibre cloth and clean the lens gently. Avoid aggressive chemicals that can damage coatings or leave residue behind. If the camera housing has a protective cover, clean that too, because grime on the outer shield can be just as destructive as dirt on the glass.
Spider activity is another predictable issue, especially where a camera sits under an eave or near a warm wall. Webs often appear directly in front of the IR beam, which means the camera lights up the obstruction instead of the person you want to record. Clearing the area around the housing matters as much as cleaning the lens itself.
Check seals before condensation does the damage
Weather seals keep moisture out, but they don't last forever. Once condensation reaches the inside of the housing, night footage can turn hazy in a way that simple cleaning won't fix. That's why a regular inspection routine is worth more than one-off emergency attention.
A maintenance schedule on cctv system maintenance is useful because it reminds you to test both image quality and physical condition together. Don't just look at the live view and move on. Check the image at night, inspect the housing, and confirm the camera is still unobstructed.
Maintenance habit: if you can't remember the last time you cleaned the lens or checked the seal, the camera is probably overdue.
Evaluating Upgrades and Professional Installation
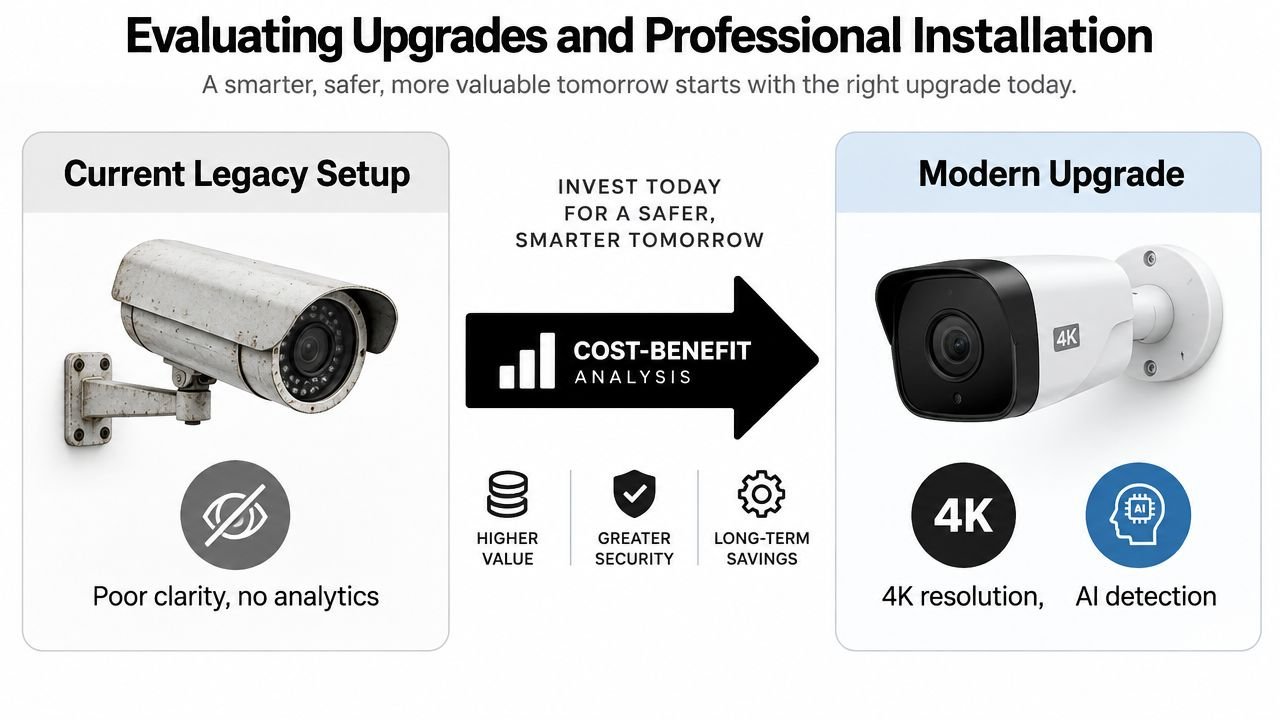
Sometimes the honest answer is that the hardware has reached its limit. Old sensors, weak IR arrays, and poor optics can only be pushed so far, and no amount of menu fiddling will turn them into a modern low-light system. That's when it makes sense to compare what you've got against a targeted upgrade, or a properly designed installation.
Know where firmware ends and hardware begins
A firmware tweak can improve switching behaviour, exposure handling, or analytics. It can't create more infrared reach than the LED array physically has. If the camera is struggling because the scene is outside its effective range, the honest fix is often a different camera, a better illuminator, or a new mounting point.
UK-focused guidance says infrared CCTV can still deliver usable footage in total darkness, but the image is normally black and white, and typical professional IR ranges are about 30 to 80 metres depending on LED power and design (Wisenet Security UK night vision guidance). That range matters because a long driveway, yard, or perimeter edge can sit outside the reach of a compact camera, even if the marketing text sounds impressive.
For a straightforward domestic setup, simple improvements may be enough. For a warehouse yard, shared car park, or multi-tenant building, overlapping coverage and consistent illumination usually matter more than swapping one camera for another.
Bring in a professional when the layout is complex
A proper site survey helps where blind spots, uneven terrain, or mixed light sources make the image unpredictable. Multi-camera systems should work as a set, not as isolated units bolted to walls at random. That's especially true on larger commercial sites where one weak zone undermines the whole perimeter.
If you want a single supplier option, Wisenet Security Ltd designs, installs, and maintains CCTV systems with infrared night vision and integrated lighting options for homes and businesses across South Wales and the South West. That kind of support is useful when the issue isn't just camera quality, but the relationship between optics, lighting, and site layout.
Troubleshooting Common Night Vision Failures
When the picture is still poor after you've checked settings, mount position, cleaning, and lighting, the fault is usually deeper in the system. Don't guess. Work through the symptoms, because the image itself tells you a lot about what's failing.
A grainy image usually points to weak light, a poor sensor, or exposure settings that are trying too hard to compensate. A washed-out image often points to too much IR reflecting back at the lens, a reflective nearby surface, or a close subject sitting inside the LED blast. A foggy image more often suggests dirt, condensation, or a housing issue.
Quick diagnostic checklist
- Check the IR LEDs: if the scene goes dark when the camera switches to night mode, the LEDs may not be activating properly.
- Watch for voltage drop symptoms: if the camera behaves in daylight but struggles once night mode turns on, the power supply may not be holding steady under load.
- Verify the IR cut filter: if colour and monochrome switching looks wrong, the filter may be sticking or the firmware may need attention.
- Inspect for physical obstructions: webs, dirt, leaves, and close reflections can all distort the image without showing an obvious hardware fault.
- Review the scene at the camera itself: if the image is bad only after dark, the issue is usually environmental or optical rather than a recording fault.
The test is whether the camera gives you identifiable detail where the incident is likely to happen. If it doesn't, the answer isn't to hope for a better replay later. Fix the cause now, while you can still control it.
If you want a proper assessment of your current setup, Wisenet Security Ltd can look at the camera placement, night-time lighting, and maintenance issues that affect evidential quality after dark. Visit Wisenet Security Ltd to arrange a conversation about CCTV night vision that works in practice.