
Electric Gate Troubleshooting: Fix Issues Fast
You press the remote. Nothing. You try again from closer to the gate. Still nothing. Then the keypad doesn't respond either, and now you're standing in the rain, late for work or blocked from getting onto your own drive.
That moment feels expensive, but it often isn't. In practice, many electric gate faults come down to a short list of causes: loss of power, a tripped safety circuit, a blocked gate path, or damp-related electrical problems that don't show up in fair-weather guides.
The first thing we always check is the simple stuff, in a fixed order. That matters. Randomly opening covers and tugging wires wastes time and can make a straightforward fault harder to diagnose. Good electric gate troubleshooting starts with safe isolation, then moves from supply, to controls, to sensors, to physical movement.
In South Wales and the South West, there's one extra wrinkle that generic advice often misses. Damp air, rain, and coastal conditions can create corrosion-induced faults that look like motor failure when the actual issue is poor low-voltage continuity at a terminal or connector.
Table of Contents
- Your Electric Gate Is Stuck Now What
- Safety First and Essential Tools You Need
- The Systematic Diagnostic Flow Start Here
- Inspecting Physical and Environmental Issues
- Common Faults And Targeted Fixes
- When to Call a Wisenet Security Technician
Your Electric Gate Is Stuck Now What
The troubleshooting process often starts the same way. The gate was working yesterday, and today it's dead, half-open, or refusing to close. That usually triggers the wrong instinct, which is to assume the motor has failed and a major repair bill is coming.
A calmer approach works better. Treat the gate like a system, not a single machine. The remote, keypad, intercom, photocells, fuse protection, control board, and operator all have to agree before the gate moves. If one part stops talking to the rest, the whole thing appears broken.
A common culprit, especially here in the South West, is something simple hidden behind bad weather. Moisture gets into a fuse holder. A sensor lens gets dirty. A branch drifts into the beam. A low-voltage connection looks intact but isn't passing power cleanly.
Most stuck gates don't need guesswork. They need order.
When we talk a homeowner through electric gate troubleshooting on a call-out, we don't begin with spanners on the motor. We begin with the safest, fastest eliminations first. Is the system powered? Has the controller locked up? Is a safety device preventing movement? Can the gate move freely by hand when properly released?
That approach gives you two useful outcomes. Either the fault turns out to be minor and fixable, or you narrow it down enough that a technician can arrive with the right parts and the right expectation. Both save time.
If your gate is stuck now, don't force it, don't keep hammering the remote, and don't open live electrical enclosures. Work through the checks below in sequence. That's how you avoid turning a routine fault into a damaged operator, a bent gate, or a safety hazard.
Safety First and Essential Tools You Need
Before touching anything, isolate the system properly. Automated gates are heavy, powerful machines with pinch points, stored force, and mains-fed components. If you rush into fault-finding with live power present, you can get hurt or damage expensive electronics.
The first thing we always check is whether the power can be safely disconnected at the breaker or main fuse board. If you know which circuit supplies the gate, switch that off. If you're unsure, isolate the mains fully before opening any housing. If the gate has an accessible battery backup, disconnect that too so the operator can't re-energise unexpectedly.
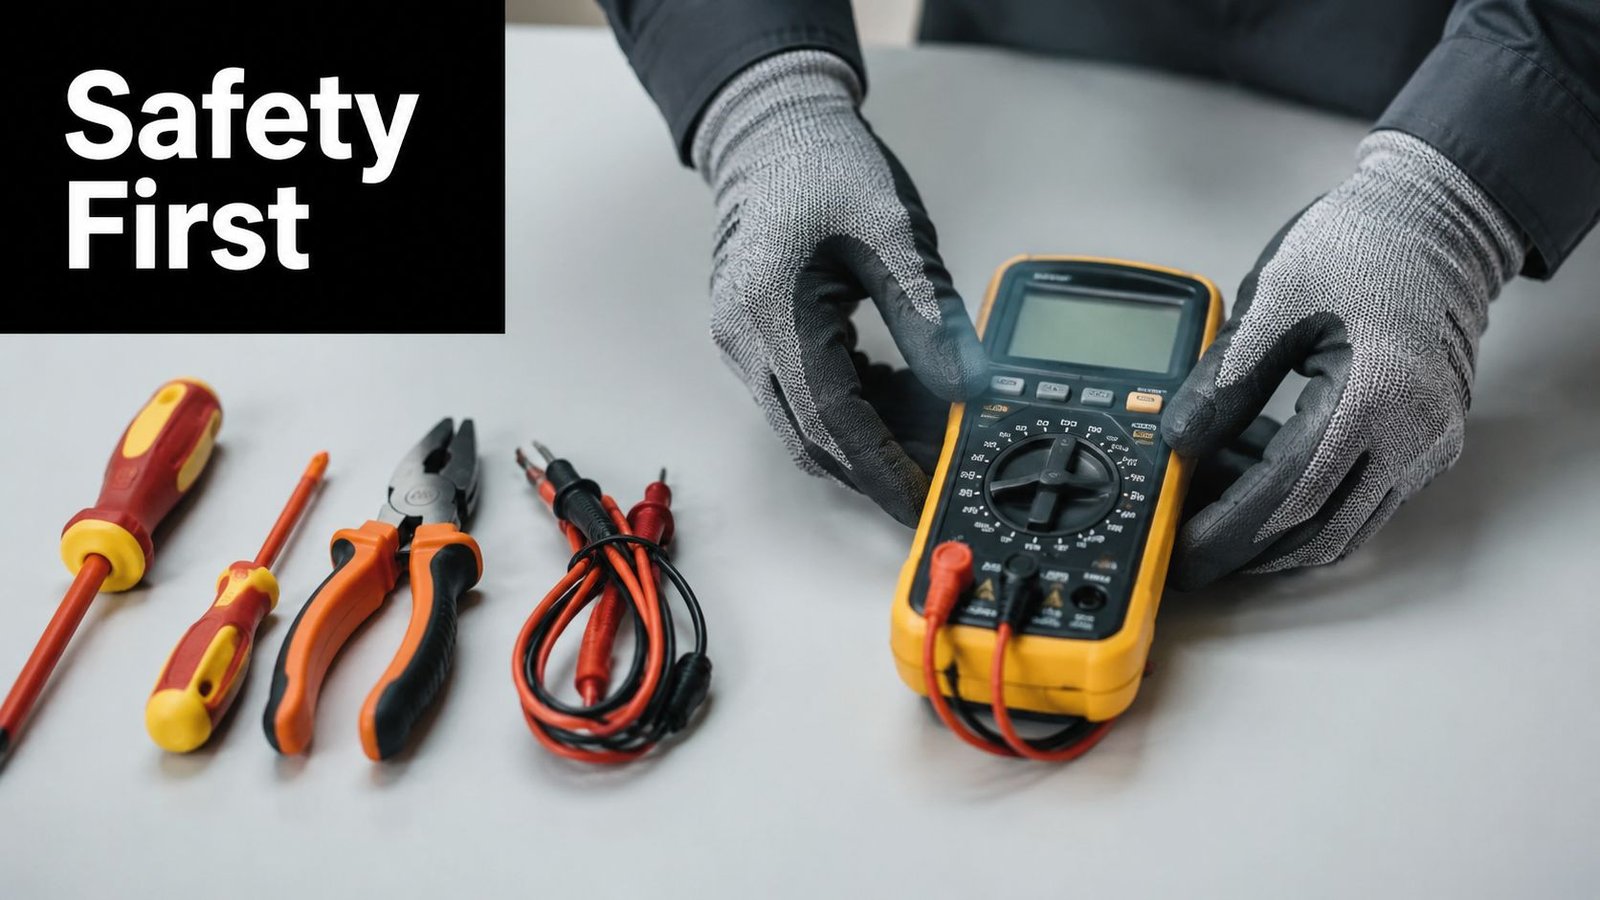
Tools worth having beside you
You don't need a van full of kit for basic checks, but a few items make a big difference:
- Torch: Gates fail at awkward times, and control boxes are often tucked into dark corners or cabinets.
- Insulated screwdrivers: Useful for cover removal, terminal checks, and tightening loose low-voltage screws after isolation.
- Protective gloves: These protect against sharp cabinet edges, dirty enclosures, and corroded fittings.
- Pliers: Handy for small clips, fuse carriers, and tidying loose debris near tracks.
- Digital multimeter: Best used to confirm isolation before you touch internal parts. If you're not confident using one, stop at visual checks.
The rule that prevents most DIY mistakes
Don't test by bypassing safety devices. Homeowners sometimes try to “prove” the motor works by shorting contacts or defeating photocells. That can create a dangerous gate movement and tells you very little about the health of the rest of the system.
Practical rule: If you can't confirm the system is dead, treat it as live.
Also keep the gate area clear while you inspect it. Children, pets, and vehicles shouldn't be near the opening while you're checking sensors, manual release, or the travel path. A gate can restart unexpectedly if power returns or if a timer, relay, or access device sends a command.
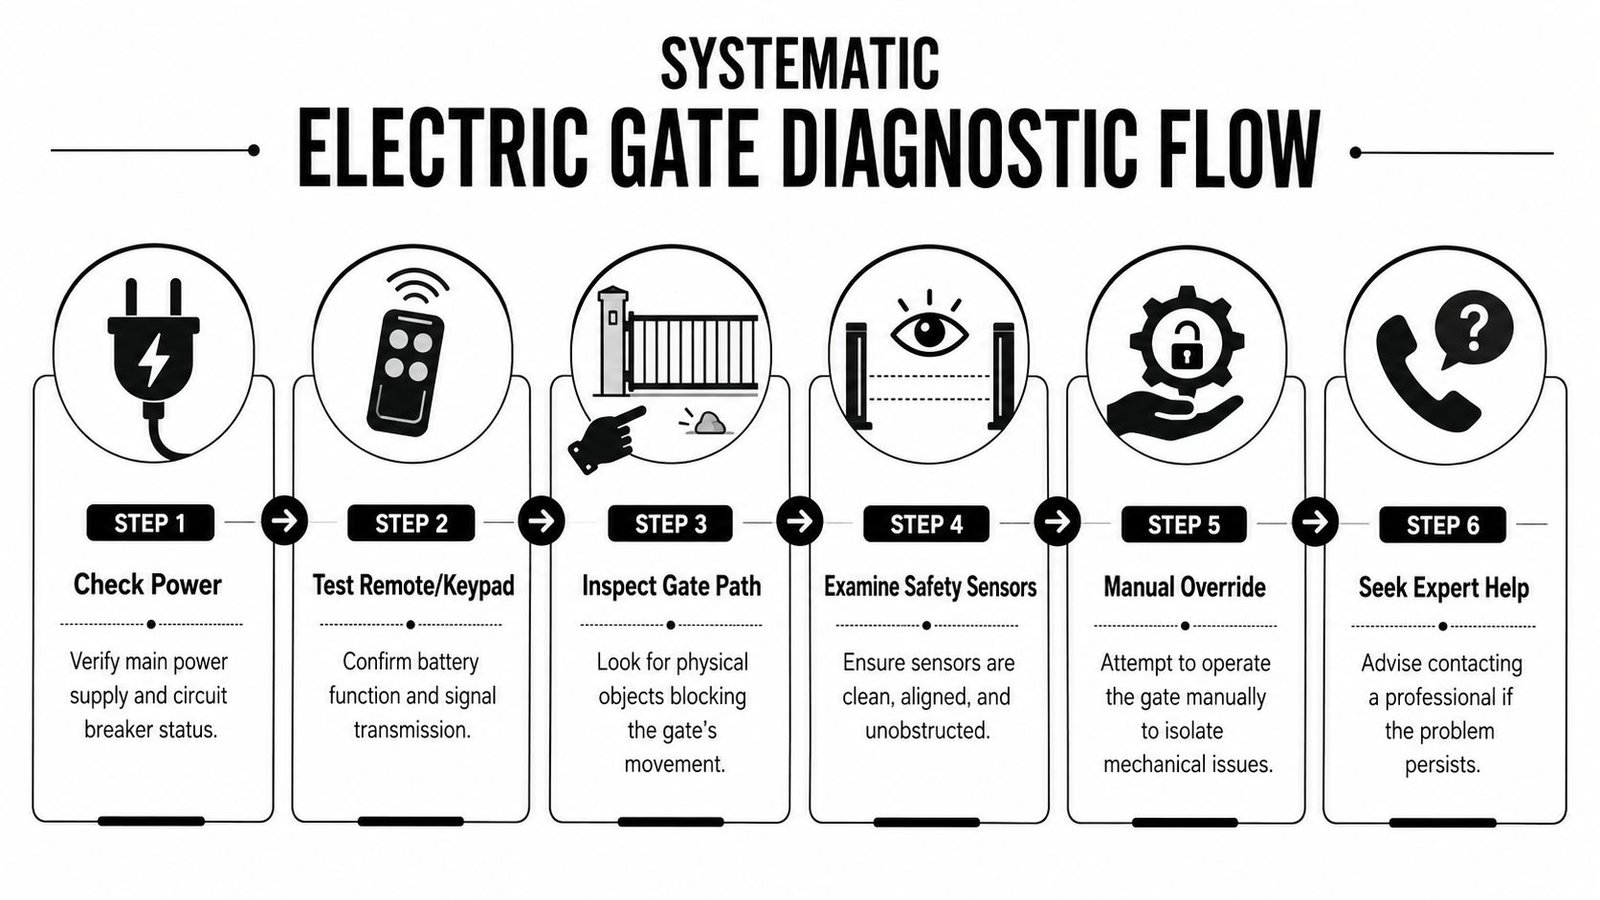
The Systematic Diagnostic Flow Start Here
The most effective electric gate troubleshooting follows a fixed sequence. A troubleshooting guide on Automatic Gate Masters cites the International Door Association saying that power cycling, by turning off the gate operator at the breaker, waiting 30 seconds, and then restoring power, resolves approximately 50% of all electric gate malfunctions annually. That's why this is the first step, not an afterthought.
Start with a calm reset
If the system is safe to re-energise for testing, restore power and try a proper reset before touching anything mechanical.
- Switch the gate supply off at the breaker
- Wait the full 30 seconds
- Restore power
- Watch and listen carefully
What you're looking for is different after power returns. Do control lights come on? Does the keypad wake up? Does the operator click? Does the gate attempt movement and stop? Those details matter more than repeated button presses.
Some gate control boards also have a reset button. If your manufacturer provides one, use it only as instructed in the manual. On many systems, holding the reset button briefly clears stored faults and restores normal response after a control glitch.
If the gate comes back to life after a reset, don't stop there. Note the weather, the time, and whether the fault followed a power cut or heavy rain. Pattern matters with intermittent issues.
For larger properties with integrated entry systems, gate faults can sit inside the wider access setup rather than the operator itself. If your property uses linked entry devices, timed permissions, or door-entry integration, it helps to understand the wider access control and door entry setup before assuming the motor is the problem.
A short visual walkthrough can help before you continue:
Check how the gate receives commands
If the reset changes nothing, move to the command devices.
- Remote handset: Press the button and see whether its indicator light responds. If it has no obvious response, replace the battery first.
- Keypad: Check whether it is lit, responsive, or showing signs of water ingress or impact damage.
- Intercom or entry panel: Look for power loss, stuck buttons, or a latch condition that may be holding the system in an odd state.
A remote problem and a gate problem can look identical from the driveway. That's why it helps to test more than one input method. If the remote fails but the keypad works, you've already narrowed the fault considerably.
Quick check: One dead remote doesn't condemn the gate. Two dead command methods point you back toward supply, controller, or safety inputs.
Look at the control board before touching anything else
If the command devices seem fine, inspect the control panel visually. Don't start moving wires around. Just observe.
Look for:
- Status LEDs: A steady light often indicates normal readiness, while flashing patterns may point to a locked-out input or safety fault.
- Burn marks or obvious water trails: These are warning signs, not DIY invitations.
- Loose glands or open cabinet seals: These often explain why moisture has reached the internals.
The fixed-order approach used in trade diagnostics goes from supply, to controller, to command inputs, to safety devices, then to the operator and field wiring. That order is faster than guessing because each stage rules out a whole set of faults before you move deeper.
Inspecting Physical and Environmental Issues
Once the basic command and power checks are done, the next step is physical inspection. During this stage, many stubborn faults are found, especially on gates exposed to rain, wind, dirt, and garden growth.
A gate doesn't need a major failure to stop. A small stone in a sliding track, a swollen patch of debris near a hinge area, or a branch sitting across the photocell beam can be enough. Safety systems are supposed to stop movement when something appears unsafe. The problem is that they can't tell the difference between a real hazard and a clump of wet leaves.
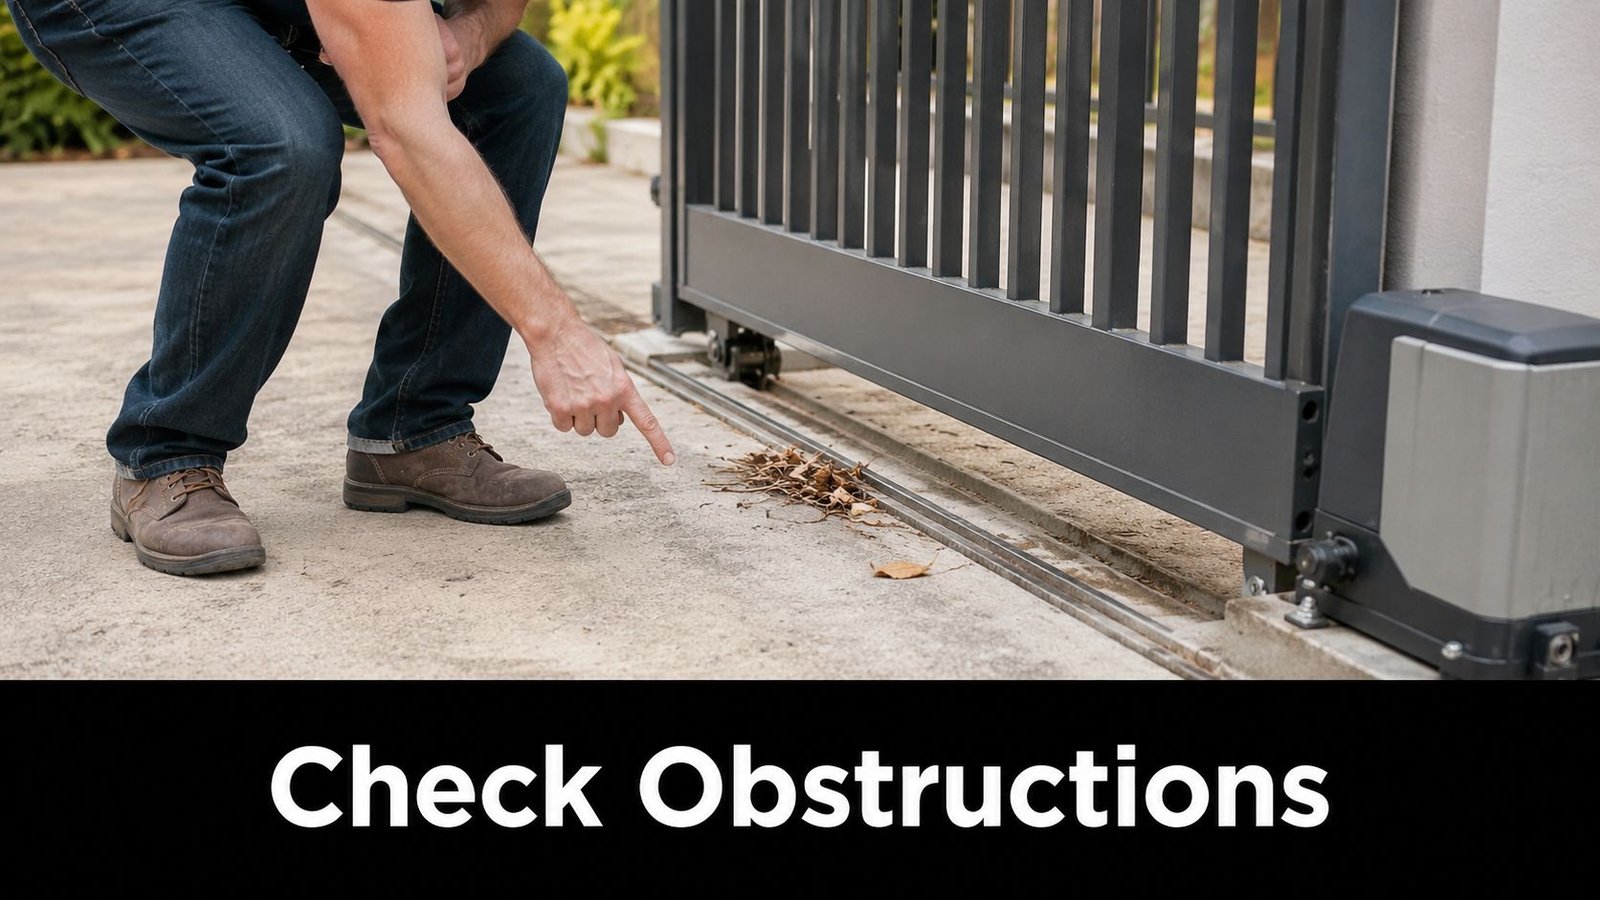
Obstructions and photocells cause more trouble than worn motors
A guide from CAME Trade Centres on reasons for gate failure notes that in the UK, a blown fuse resulting from water ingress is a common cause of electric gate failure, and it also highlights overgrown foliage and sensor alignment as recurring causes. That matches what we see on exposed sites.
Start with the gate path itself:
- Check the travel route: Look for stones, sticks, compacted mud, leaf build-up, or anything wedged into the track or near a stop point.
- Inspect the hinges or rollers visually: You're not dismantling them, just looking for obvious binding, impact damage, or misalignment.
- Clean the photocells: Dirt, algae, spider webs, and condensation on the lens can interrupt the beam.
Then confirm the photocells face one another. Most systems use indicator LEDs on the sensor housings. If one is dark, flashing, or inconsistent, alignment may be off. Very small movement in a mounting bracket can be enough to stop the gate from closing.
If your system is older or exposed, the gate hardware itself may need attention too. For those interested in the equipment side, a look at common gate automation kit components helps make sense of what each part is meant to do and where faults often show up.
The South West fault many guides miss
A common culprit, especially here in the South West, is corrosion-induced voltage drop at low-voltage terminals. The same CAME Trade Centres source notes that in coastal and moist climates like Swansea or Newport, corrosion on low-voltage terminal screws can cause significant voltage drops, accounting for up to 60% of intermittent remote failures.
This fault is easy to miss because the system may appear half-alive. The board might light up. The keypad might work sporadically. The remote might only respond when you stand close. That leads people to change handset batteries, replace remotes, or suspect the motor, when the underlying problem is resistance at a damp, corroded connection.
Look carefully inside the control enclosure, but only after safe isolation. Signs include:
- Green or white crusting on terminal screws or copper ends
- Darkened or dull wire ends instead of bright clean metal
- Moisture marks near cable entries or the bottom of the cabinet
- Loose low-voltage screws that no longer clamp the conductor firmly
If you find light surface corrosion on a low-voltage terminal and you're competent to proceed with the power isolated, cleaning the contact area and re-tightening can restore reliable operation. What doesn't work is ignoring it and replacing random parts around it. Corrosion faults repeat until the bad connection is addressed.
Gates near the coast often fail electrically before they fail mechanically.
Common Faults And Targeted Fixes
Symptoms tell a story if you read them properly. A gate that is completely dead points you one way. A gate that starts, stops, and reverses points you another. A gate that works on manual release but not under power narrows the field even further.
The useful question isn't “what part is broken?” It's “what condition is the system reacting to?” Gates stop for safety reasons, communication reasons, and power reasons long before they stop for dramatic mechanical reasons.
Electric Gate Troubleshooting Cheat Sheet
| Symptom | Possible Cause | DIY Check / Fix | When to Call a Pro |
|---|---|---|---|
| Gate is completely unresponsive | No mains supply, tripped breaker, blown fuse, dead controller | Check breaker status, confirm other powered devices on the circuit if relevant, inspect for obvious fuse issues after isolation, perform a proper reset | If power is present but the controller remains dead |
| Remote does nothing but keypad works | Remote battery, programming issue, weak signal, corroded low-voltage connection affecting receiver performance | Replace remote battery, try a second handset, inspect low-voltage terminals for corrosion after isolation | If remotes still fail after battery replacement and visual terminal checks |
| Gate opens but won't close | Photocell beam blocked, sensor misalignment, foliage interference | Clean lenses, clear branches or leaves, confirm sensors face each other and indicator lights look normal | If sensors won't align or the fault returns repeatedly |
| Gate starts moving then stops or reverses | Obstruction in path, track debris, safety edge or photocell trigger | Check travel path, remove debris, inspect for rubbing or impact points | If no obstruction is visible and the gate continues reversing |
| Motor hums or buzzes but gate doesn't move | Seized operator, failed internal component, mechanical binding | Do not force the gate. Use manual release if you know the correct procedure and only when safe | If the motor casing or gearbox may need opening |
| Gate moves manually but not electrically | Electrical or control-side fault rather than basic gate mechanics | Focus on commands, sensors, terminals, and controller indicators | If the electrical fault isn't obvious after safe checks |
| Intermittent operation in wet weather | Water ingress, corroded terminals, damp inside accessories | Inspect enclosure seals, cable entries, and terminal condition after isolation | If moisture has reached the board or faults keep returning |
| Keypad and intercom behave oddly | Stuck relay, damaged entry device, external control input holding the gate | Power cycle the system, inspect for visible damage or stuck buttons | If integrated entry equipment needs testing or reconfiguration |
When access devices are part of the problem
Not every gate fault sits inside the operator cabinet. Some come from the equipment that tells the gate when to open, close, or stay put. Cellular entry systems, intercoms, and remote access controls can all introduce behaviour that looks like a gate fault from the outside.
If your setup includes mobile-triggered entry, it helps to understand how cellular gate openers work so you can separate a communication issue from a motor or sensor issue. That's especially useful when the gate responds inconsistently to app, call, fob, and keypad commands.
A good rule is this: if one input method fails, test another. If all methods fail, think upstream. If one works and one doesn't, focus on that access device before blaming the operator.
When to Call a Wisenet Security Technician
There's a clear point where DIY checking should stop. If the fault needs live electrical testing, internal motor work, board-level repair, or structural correction, that's technician territory.
A repair guide on City Gates USA notes that expert escalation criteria for UK gate systems include live voltage diagnostics, recurring intermittent faults, gearbox or motor replacement, and structural repairs affecting alignment, because those jobs need licensed technicians and safe compliance with applicable standards. That's the right line to draw.
Draw the line before the repair gets risky
Call a professional if any of these apply:
- The same fault keeps returning: Intermittent faults often involve moisture, damaged wiring, or failing components that need proper testing.
- You suspect a motor or gearbox issue: Don't open operator assemblies without the right training and parts.
- There are burn marks, melted insulation, or signs of a damaged board: That's no longer a homeowner reset-and-clean problem.
- The gate grinds, crunches, drags, or sits visibly out of line: Mechanical and structural issues can escalate quickly.
If you're hearing rubbing or roller-related noise on a sliding system, some background reading on engineering quiet door roller systems is useful for understanding why noise often points to alignment or rolling resistance rather than a simple control fault.
For property owners managing busier sites, it also helps to view the gate as part of the wider perimeter system, including gates and barriers solutions. The more integrated the site, the more important correct diagnosis becomes.
A call-out isn't admitting defeat. It's the sensible next step when the fault moves beyond safe isolation, visual inspection, and straightforward cleaning or reset work.
If your gate is still stuck, cycling unpredictably, or showing signs of water ingress or corrosion, Wisenet Security Ltd can help with safe diagnosis, repair, and ongoing maintenance across South Wales and the South West. Their engineers work on domestic, commercial, and multi-tenant gate systems, and they can identify whether the problem sits in the operator, controls, safety devices, or wider access setup.